Subpanel Installation Guide: When and Why You Need One for Your Los Angeles Home
Introduction
As Los Angeles homeowners add garages, workshops, accessory dwelling units (ADUs), home additions, and electric vehicle chargers to their properties, many discover their existing electrical panels can't accommodate additional circuits. When your main electrical panel runs out of available breaker spaces, or when you need substantial power at a location distant from the main panel, a subpanel (also called a feeder panel or distribution panel) provides the solution. These secondary electrical panels connect to your main panel via large feeder cables, effectively expanding your home's circuit capacity and allowing safe, code-compliant electrical distribution to remote areas of your property. At Shaffer Construction, Inc., we've installed hundreds of subpanels throughout Los Angeles for garages, ADUs, workshops, pool houses, home additions, and EV charger installations. This comprehensive guide covers everything you need to know about when subpanels are necessary, how they work, proper sizing and installation requirements, code compliance, costs, and why professional installation ensures safety and reliability for decades to come.
What is a Subpanel and How Does It Work?
An electrical subpanel is a secondary distribution panel that receives power from your main electrical panel through large feeder cables, then distributes that power to multiple branch circuits serving specific areas or functions. Think of your main panel as the central hub receiving power from the utility company, while subpanels function as satellite distribution points extending electrical capacity to different locations. This hierarchical system allows efficient power distribution across larger properties or homes with diverse electrical needs without overloading single circuits or running excessively long wire runs from the main panel.
The fundamental components of a subpanel system include the subpanel enclosure (a metal box housing circuit breakers, typically wall-mounted), circuit breakers (individual switches protecting each branch circuit, similar to those in your main panel), feeder cables (large gauge wires carrying power from the main panel to the subpanel), main panel feeder breaker (a large breaker in your main panel protecting the feeder circuit to the subpanel), neutral and ground bus bars (separate metal bars in the subpanel for neutral and ground wire connections), and branch circuits (individual circuits running from the subpanel to outlets, lights, appliances, or equipment).
The key electrical principle distinguishing subpanels from main panels involves neutral and ground separation. In your main service panel, neutral and ground wires connect to the same bus bar because it's the first point of disconnect and the location where the grounding electrode system connects. However, in subpanels, neutral wires and ground wires must connect to separate, isolated bus bars. This critical safety requirement prevents dangerous neutral current from flowing through grounding paths, which could energize equipment enclosures and create shock hazards. Professional electricians ensure proper neutral-ground separation during subpanel installation - a detail that DIY installers frequently get wrong, creating code violations and safety hazards. As discussed in our guide to understanding electrical systems, proper panel configuration ensures safe, efficient power distribution throughout your home.
When you activate a circuit breaker in a subpanel, electricity flows from the utility lines through your electric meter, into your main panel, through the feeder breaker protecting the subpanel circuit, along the feeder cables to the subpanel, through the individual branch circuit breaker you activated, and finally through branch circuit wiring to your lights, outlets, or equipment. This distribution system allows you to install dozens of circuits in the subpanel while consuming only one or two breaker spaces in your main panel (depending on whether you use a single-pole or double-pole feeder breaker).
When You Need a Subpanel: Common Applications in Los Angeles Homes
Several situations necessitate subpanel installation, making them among the most common electrical upgrades Los Angeles homeowners undertake. Understanding these scenarios helps you recognize when your electrical needs require a subpanel rather than simple circuit additions or other solutions.
Main Panel Out of Breaker Spaces
The most straightforward reason for subpanel installation occurs when your main electrical panel has no available breaker spaces for new circuits. Older panels typically include 20 to 40 breaker positions, while modern homes often require 40 to 60 circuits to serve all appliances, lighting, outlets, and specialized equipment. If you need to add circuits for kitchen remodeling, bathroom upgrades, outdoor lighting, or any other purpose but have no empty spaces in your main panel, a subpanel provides additional circuit capacity without requiring complete main panel replacement. Installing a subpanel typically costs 800 to 2,000 dollars, far less than the 2,500 to 5,000 dollar cost of complete panel upgrades when your main panel has sufficient overall amperage capacity but lacks available spaces.
Garage and Workshop Electrical Needs
Garages and workshops represent the most common subpanel application in Los Angeles residential properties. These spaces typically require multiple 120-volt circuits for lighting, outlets, and small tools, plus 240-volt circuits for equipment like table saws, air compressors, welders, electric vehicle chargers, or automotive lifts. Running eight or ten individual circuits from your main panel to a detached garage wastes wire, costs more than installing a subpanel, and consumes numerous main panel breaker spaces. A single feeder circuit to a garage subpanel allows you to install as many branch circuits as needed while using only one or two main panel spaces. Most garage subpanels range from 60 to 100 amps, providing ample capacity for typical residential workshop needs including multiple power tool circuits, lighting, outlets, and even Level 2 EV charger installation. Our article about EV charger installation explores garage electrical requirements in detail.
Accessory Dwelling Units (ADUs)
Los Angeles ADU construction has exploded in recent years as homeowners capitalize on California's ADU-friendly regulations to create rental units, in-law suites, or home offices. ADUs require complete electrical systems including lighting, outlets, kitchen appliances, bathroom circuits, heating and cooling, and potentially laundry equipment - easily 10 to 20 circuits total. Building codes require ADUs to have separate electrical panels for safety and convenience, making subpanel installation mandatory rather than optional. ADU subpanels typically range from 100 to 125 amps depending on unit size and anticipated electrical loads. Proper ADU electrical planning includes load calculations ensuring your main panel has sufficient capacity to supply the ADU subpanel, which sometimes necessitates main panel upgrades from 100 to 200 amps. For comprehensive ADU electrical services including subpanel installation, load calculations, and complete wiring, see our ADU electrical installation services.
Home Additions and Major Renovations
When adding square footage through room additions, second-story additions, or converting garages to living space, electrical codes require sufficient circuits to serve the new spaces. A 400-square-foot addition might need 6 to 10 new circuits for lighting, outlets, heating/cooling, and any specialized equipment. Installing a subpanel in or near the addition simplifies wiring, reduces costs compared to running numerous individual circuits from the main panel, and provides flexibility for future circuit additions without returning to the main panel. Many Los Angeles homeowners installing home additions discover that combining subpanel installation with necessary main panel upgrades provides the most cost-effective, future-proof electrical solution.
Long Distance from Main Panel
Voltage drop becomes problematic when running circuits long distances from your main panel. Electrical resistance in wiring causes voltage to decrease over distance, and codes limit allowable voltage drop to 3 percent for branch circuits. For circuits exceeding 100 to 150 feet from the main panel, you must use larger, more expensive wire gauges to minimize voltage drop - often making the wire costs alone exceed subpanel installation expenses. Installing a subpanel near the remote location allows short branch circuit runs from the subpanel while the single feeder circuit uses appropriately sized large-gauge wire to minimize voltage drop. This approach saves money, improves electrical performance, and simplifies future circuit additions. Properties with detached structures, pool houses, workshops, or equipment locations far from the main house particularly benefit from this strategy.
EV Charger Installation Requiring Dedicated Panel
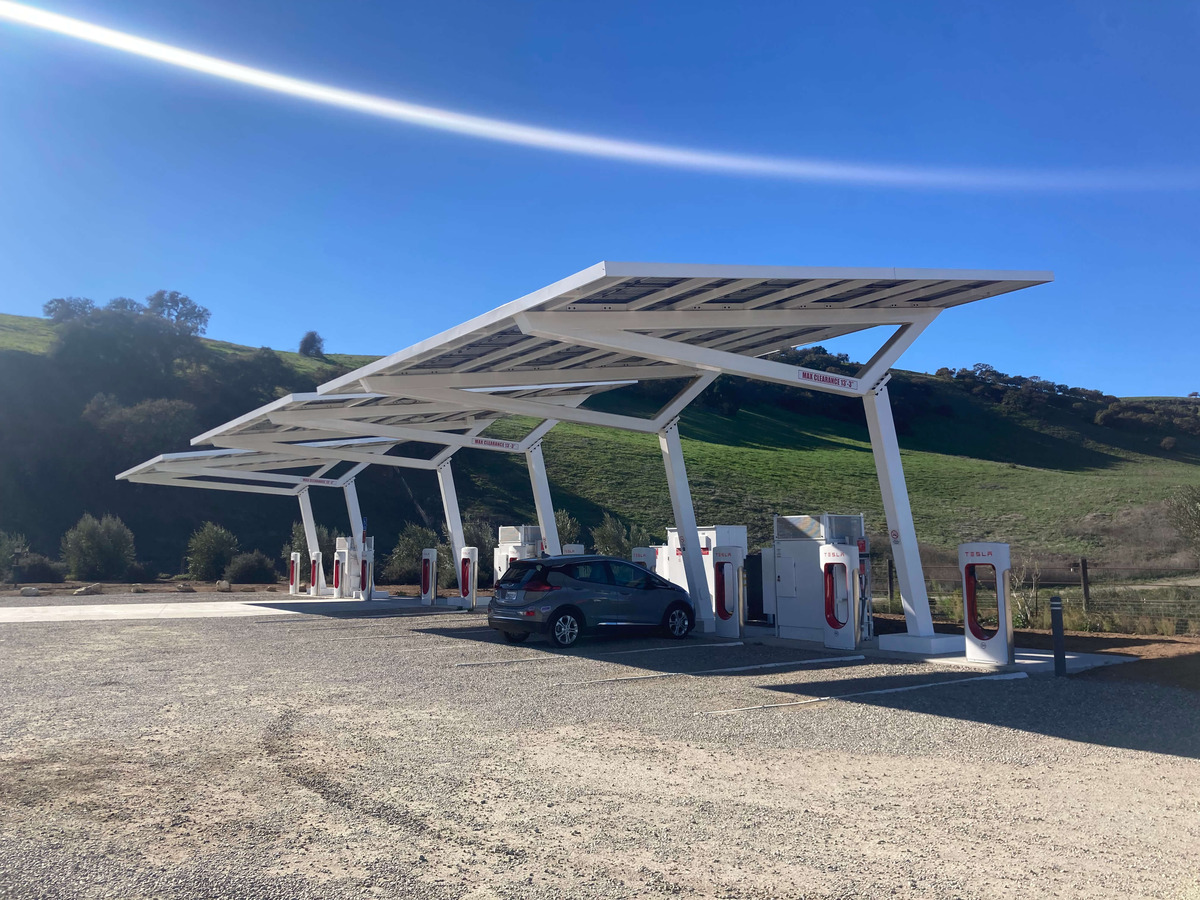
Level 2 electric vehicle chargers typically require dedicated 40 to 60 amp circuits - among the largest residential circuits after ranges and dryers. Many Los Angeles homeowners installing EV chargers discover their main panels lack both available breaker spaces and sufficient overall capacity to support the charger circuit. Installing a subpanel specifically for the EV charger provides several advantages: allows future installation of additional EV charger circuits as families acquire multiple electric vehicles, provides capacity for garage lighting, outlets, and workshop circuits, avoids main panel complications when the charger location is distant from the main panel, and simplifies future service or upgrades to the charging system. A 60 to 100 amp garage subpanel accommodates current EV charging needs while providing flexibility for future electrical requirements.
Pool Houses and Detached Structures
Pool houses, detached studios, she-sheds, man-caves, and similar outbuildings require multiple circuits but don't need the full 100 to 200 amp service required for ADUs. A 60 to 100 amp subpanel provides sufficient capacity for lighting, outlets, heating/cooling, and small appliances while keeping costs reasonable. The alternative - running six or eight individual circuits underground to the structure - costs more in trenching and wire expenses while consuming valuable main panel spaces. For any detached structure requiring more than two or three circuits, subpanel installation represents the professional, code-compliant, cost-effective solution.
Subpanel Sizing: Determining the Right Amperage for Your Needs
Selecting appropriate subpanel amperage requires analyzing the total electrical load the panel will serve, considering future expansion needs, and ensuring your main panel has sufficient capacity to supply the subpanel. Understanding common subpanel sizes and their typical applications helps you plan appropriately.
60-Amp Subpanels
Sixty-amp subpanels represent the smallest size typically installed in Los Angeles residential applications. These panels suit light-duty applications including small workshops with basic power tools and lighting (but without heavy equipment like welders or large compressors), pool houses or sheds requiring lighting, outlets, and minor appliances, outdoor kitchens with lighting, outlets, and small appliances (but without large grills or refrigerators), and utility areas serving landscape lighting, pool equipment, or similar loads. A 60-amp panel provides 7,200 watts of capacity at 120 volts or 14,400 watts at 240 volts - sufficient for multiple lighting and outlet circuits plus one or two moderate appliance circuits. However, 60-amp panels don't provide adequate capacity for EV chargers, which typically require 40 to 60 amp dedicated circuits, or garages with multiple large power tools operating simultaneously.
100-Amp Subpanels
One-hundred-amp subpanels represent the most common residential subpanel size, offering excellent balance between capacity, cost, and flexibility for typical applications. These panels accommodate garages and workshops with multiple power tools, lighting, outlets, and Level 2 EV chargers, small ADUs (under 600 square feet) with basic electrical needs, home additions requiring 10 to 15 circuits, pool houses with significant amenities including heating/cooling, or any application requiring 20 to 30 branch circuits. A 100-amp panel provides 12,000 watts at 120 volts or 24,000 watts at 240 volts - ample capacity for diverse residential needs while remaining cost-effective. The feeder wire for 100-amp subpanels typically uses #2 AWG aluminum or #4 AWG copper, balancing performance and cost.
125-Amp Subpanels
One-hundred-twenty-five-amp subpanels occupy the middle ground between standard 100-amp and full 200-amp panels, suitable for larger ADUs (600 to 1,000 square feet) approaching small home electrical requirements, significant home additions with substantial electrical demands, workshops with heavy equipment including welders, large compressors, or machinery, or applications requiring multiple high-draw circuits operating simultaneously. Many Los Angeles electricians recommend 125-amp subpanels for ADUs to provide capacity for future upgrades, additional appliances, or changed usage patterns without requiring eventual subpanel replacement. The incremental cost difference between 100 and 125-amp installations is modest - typically 100 to 200 dollars - making the additional capacity worthwhile when needs approach 100-amp limits.
200-Amp Subpanels
Two-hundred-amp subpanels match main service panel capacity, reserved for applications with demands approaching those of complete homes. These large subpanels suit large ADUs (over 1,000 square feet) functioning as independent residences, major home additions essentially doubling existing home size, commercial workshops or studios with substantial equipment loads, or properties where the subpanel might eventually become the main panel during future expansions or remodels. Installing 200-amp subpanels requires careful main panel capacity analysis - most 200-amp main panels can't support a full 200-amp subpanel circuit without violating load limits. Professional load calculations, as described in our electrical load study services, determine whether your main panel can safely supply a large subpanel or requires upgrading to higher capacity.
Professional electricians perform load calculations using standard formulas accounting for all anticipated circuits, applying demand factors that reflect realistic usage patterns (not all circuits drawing maximum power simultaneously), and adding 20 to 25 percent capacity margin for future expansion. These calculations ensure your subpanel has adequate capacity while avoiding wasteful oversizing that increases costs unnecessarily. DIY load calculations frequently produce errors that result in undersized panels requiring eventual replacement or oversized panels wasting money on unused capacity.
Feeder Wire Requirements: Choosing the Right Wire Gauge
Feeder cables connecting your main panel to the subpanel must be sized appropriately to carry the full subpanel amperage safely without overheating or excessive voltage drop. Understanding wire gauge requirements helps you budget accurately and ensures code-compliant installation.
National Electrical Code specifies minimum wire gauges based on amperage and wire type (copper versus aluminum). For copper feeder wires, the requirements are: 60-amp subpanel requires #6 AWG copper (for runs under 100 feet), 100-amp subpanel requires #4 AWG copper (for runs under 100 feet), 125-amp subpanel requires #2 AWG copper (for runs under 100 feet), and 200-amp subpanel requires #2/0 AWG copper (for runs under 100 feet). For aluminum feeder wires, which cost less but require larger physical sizes, the requirements are: 60-amp subpanel requires #4 AWG aluminum, 100-amp subpanel requires #2 AWG aluminum, 125-amp subpanel requires #1 AWG aluminum, and 200-amp subpanel requires #4/0 AWG aluminum.
These wire sizes assume feeder runs under 100 feet and typical residential applications. Longer runs require larger wire gauges to compensate for voltage drop - professional electricians calculate exact wire sizes based on feeder length, voltage, and amperage using standard voltage drop formulas. For subpanel feeders exceeding 150 to 200 feet, voltage drop calculations often dictate wire sizes one or two gauges larger than minimum code requirements. While this increases material costs, proper wire sizing ensures voltage at the subpanel remains within acceptable limits, preventing equipment malfunction, premature failure, and code violations.
Most residential subpanel feeders use copper or aluminum conductors in underground-rated cable assemblies for buried applications or individual wires in conduit for above-ground installations. Underground feeder (UF) cable and direct-burial rated conductors work for trenched applications between buildings, while metal or PVC conduit protects individual wires in exposed locations, through walls, or in accessible spaces. California Title 24 energy code and NEC requirements specify proper cable types for each application - professional electricians ensure code compliance that passes inspection and provides long-term reliability.
The choice between copper and aluminum conductors involves balancing costs and performance. Copper offers better conductivity allowing smaller physical wire sizes, easier workability and termination, better long-term reliability, and corrosion resistance. However, copper costs significantly more than aluminum - often double or triple the price for equivalent capacity. Aluminum provides lower material costs (particularly important for long feeder runs), acceptable performance when properly installed, and code compliance for residential feeders. However, aluminum requires larger physical sizes, demands special termination techniques and anti-oxidant compounds, and historically suffered reliability problems (though modern aluminum alloys have resolved these issues when correctly installed). For most Los Angeles residential subpanel installations, aluminum feeders represent cost-effective solutions when installed by professional electricians following proper techniques.
Four-Wire vs. Three-Wire Subpanel Feeders: Understanding Neutral-Ground Separation
Modern electrical code requires four-wire feeders for virtually all subpanel installations, with neutral and ground wires remaining separate throughout the system. Understanding this requirement and its safety implications helps homeowners recognize proper installation and avoid dangerous code violations common in amateur electrical work.
Four-wire feeder systems include two hot conductors (black and red wires carrying 240 volts between them and 120 volts each relative to neutral), one neutral conductor (white or gray wire providing the return path for 120-volt circuits), and one grounding conductor (bare copper or green wire providing equipment grounding and fault protection). In the subpanel, neutral wires connect to an isolated neutral bus bar that's electrically separated from the panel enclosure, while ground wires connect to a separate ground bus bar that's bonded (electrically connected) to the metal panel enclosure. This separation ensures that normal neutral current flows only through the neutral wire back to the main panel, not through grounding paths where it could energize equipment enclosures and create shock hazards.
In contrast, three-wire feeders (used in some older installations but no longer code-compliant for new subpanels) include only two hot conductors and one neutral conductor that also serves as the ground. This configuration creates dangerous conditions where neutral current flows through metal enclosures, conduit, and grounding systems, potentially energizing equipment and structures. Modern electrical code prohibits three-wire subpanel feeders except in very specific circumstances involving separate structures with their own grounding electrode systems - and even these applications increasingly require four-wire systems under updated code interpretations.
Professional electricians install four-wire systems ensuring the subpanel has separate neutral and ground bus bars with only the ground bar bonded to the enclosure, the neutral bus bar remains completely isolated from the enclosure through insulated mounting, neutral wires from branch circuits connect only to the neutral bus, ground wires from branch circuits connect only to the ground bus, the feeder neutral wire connects to the isolated neutral bus, and the feeder ground wire connects to the bonded ground bus. This configuration requires careful attention during installation - even experienced electricians occasionally make bonding errors that inspectors catch during final inspection. DIY installers frequently create dangerous neutral-ground bonding violations that may not be discovered until someone receives a shock or equipment fails.
Grounding Requirements for Subpanels in Los Angeles
Proper grounding protects people and equipment from electrical faults, provides lightning protection, and ensures circuit breakers trip correctly during short circuits. Los Angeles electrical code, based on National Electrical Code with California amendments, specifies detailed grounding requirements that professional electricians follow meticulously.
For subpanels in detached structures (garages, ADUs, pool houses, workshops), code requires separate grounding electrode systems independent from the main building grounding. This typically involves installing ground rods (two 8-foot copper-clad steel rods driven into earth, spaced at least 6 feet apart), a grounding electrode conductor (copper wire connecting ground rods to the subpanel ground bus), bonding to metal water pipes within the structure (if present), and bonding to structural metal or reinforcing steel (if accessible). These grounding electrodes provide local earth reference reducing voltage differences between structures during lightning strikes or utility faults.
For subpanels in attached structures or within the main building, separate grounding electrodes are generally not required since the feeder ground wire connects to the main panel's grounding system. However, the subpanel ground bus must be bonded to metal enclosures, all metal raceways (conduit) must be properly bonded, and metallic water pipes, gas pipes, and structural steel near the subpanel must be bonded per code requirements. These bonding connections ensure that all metal components remain at the same electrical potential, preventing dangerous voltage differences during fault conditions.
Ground fault circuit interrupter (GFCI) protection requirements apply to subpanel circuits just as they do to main panel circuits. All bathroom outlets, kitchen countertop outlets, outdoor outlets, garage outlets, and other locations specified by code must have GFCI protection via GFCI breakers in the subpanel or GFCI outlets serving those locations. Arc fault circuit interrupter (AFCI) protection requirements similarly apply to bedroom circuits and other specified locations. Professional electricians ensure all subpanel circuits include appropriate GFCI and AFCI protection matching code requirements for new installations.
Installation Process and Code Requirements
Professional subpanel installation follows systematic processes ensuring safety, code compliance, and reliable long-term performance. Understanding typical installation steps helps homeowners recognize quality work and appreciate the complexity involved.
The installation process begins with load calculations determining appropriate subpanel size and verifying main panel capacity to supply the subpanel circuit. Electricians calculate all anticipated loads including lighting, outlets, appliances, and equipment, apply appropriate demand factors, add capacity margins for future expansion, and confirm the main panel can support the additional load without exceeding its rated capacity. These calculations often reveal the need for main panel upgrades before subpanel installation - a critical discovery that prevents dangerous overloading.
Next comes permitting and plan review. Los Angeles requires electrical permits for subpanel installations, with plan review for larger projects or complex installations. Licensed electricians prepare electrical plans showing subpanel location, feeder routing, panel specifications, load calculations, and grounding details. The Department of Building and Safety reviews plans ensuring code compliance before issuing permits authorizing installation. Permit costs vary from 150 to 500 dollars depending on project scope, with plan review adding time to project schedules but ensuring installations meet all code requirements.
Physical installation involves multiple steps requiring professional expertise and specialized tools. Electricians mount the subpanel enclosure securely to structural framing or masonry walls at appropriate heights (typically with the panel center 5 to 6 feet above floor level), install feeder conduit or cable from the main panel to the subpanel location (routing through walls, attics, basements, or underground as required), pull feeder conductors through conduit or install cable assemblies, terminate feeder conductors at both panels with proper torque and techniques, install the feeder breaker in the main panel, configure the subpanel neutral and ground bus bars correctly, install branch circuit breakers as needed, label all circuits clearly, and install weatherproof enclosures for outdoor installations. Each step requires adherence to code specifications - wire bending radii, termination techniques, conductor support, conduit fill limits, and countless other details that distinguish professional installation from amateur work.
Testing and inspection complete the process. Before energizing the subpanel, electricians test for proper grounding continuity, verify neutral-ground separation, confirm all connections are tight and correct, check for any short circuits or ground faults, and verify proper voltage at both panels. After successful testing, the installation undergoes inspection by City of Los Angeles electrical inspectors who verify code compliance, proper installation techniques, adequate grounding, correct neutral-ground separation, and appropriate labeling. Only after passing inspection can the installation be legally energized and used. Attempting to operate subpanels before inspection creates code violations, potential insurance complications, and safety hazards.
Distance Considerations and Voltage Drop Calculations
When subpanels serve locations distant from the main panel, voltage drop becomes a critical design consideration. Excessive voltage drop causes lights to dim, motors to overheat and fail prematurely, electronic devices to malfunction, and inefficient energy consumption. Understanding voltage drop helps homeowners appreciate why professional installations use larger wire sizes than DIY calculations might suggest.
Voltage drop occurs due to electrical resistance in feeder conductors - as current flows through wire, resistance converts some electrical energy to heat, reducing voltage available at the subpanel. The National Electrical Code recommends limiting voltage drop to 3 percent for feeder circuits and 5 percent total for combined feeder and branch circuits. For a typical 240-volt feeder, 3 percent voltage drop equals 7.2 volts - seemingly small but sufficient to cause problems with sensitive equipment and reduce efficiency.
Several factors affect voltage drop: feeder length (longer runs create more resistance and greater voltage drop), amperage (higher current increases voltage drop proportionally), wire gauge (larger conductors have lower resistance and less voltage drop), wire material (copper has lower resistance than aluminum for equivalent sizes), and voltage (240-volt circuits tolerate more absolute voltage drop than 120-volt circuits for the same percentage). Professional electricians use voltage drop calculators or formulas accounting for all these factors, determining optimal wire sizes that balance performance and costs.
For example, a 100-amp subpanel located 100 feet from the main panel operating at 80 percent of capacity (80 amps) experiences different voltage drops depending on wire size. Using #4 AWG copper (minimum code size) creates approximately 4.5 percent voltage drop - exceeding recommended limits. Increasing to #2 AWG copper reduces voltage drop to approximately 2.8 percent - within acceptable range. For a 200-foot feeder under the same conditions, #2 AWG copper creates 5.6 percent voltage drop, while #1/0 AWG copper reduces it to 2.8 percent. The larger wire costs more but ensures reliable operation and code compliance.
Los Angeles homeowners with detached structures, long driveway gate operators, pool equipment, or other distant loads frequently discover that voltage drop calculations require wire sizes substantially larger than minimum code requirements based solely on ampacity (current-carrying capacity). While this increases installation costs, proper wire sizing prevents operational problems and delivers long-term reliability worth the investment.
Subpanel Installation Costs in Los Angeles
Understanding realistic subpanel installation costs helps Los Angeles homeowners budget appropriately for these essential electrical upgrades. Prices vary significantly based on subpanel size, installation complexity, feeder length and routing, existing electrical infrastructure, and whether installation occurs during new construction versus retrofit in existing buildings.
Basic subpanel installations in accessible locations with straightforward feeder routing typically cost 800 to 1,500 dollars for 60 to 100 amp panels. This includes the subpanel enclosure and breakers, feeder wire and conduit for runs under 50 feet, installation labor by licensed electricians, electrical permits and inspection fees, and basic setup with 4 to 6 branch circuit breakers. These baseline costs assume the main panel has available capacity and breaker spaces for the feeder circuit, feeder routing through accessible attics or basements, and installation in attached garages or interior locations not requiring trenching or extensive conduit runs.
Mid-range installations with moderate complexity typically cost 1,500 to 2,500 dollars. These projects include larger 100 to 125 amp subpanels, longer feeder runs (50 to 100 feet) requiring additional wire and conduit, installation in detached structures requiring trenching or overhead routing, grounding electrode system installation for detached buildings, weatherproof outdoor enclosures, and more complete circuit installations with 8 to 12 breakers. Many Los Angeles garage and ADU subpanel installations fall in this cost range.
Premium installations featuring large panels, complex routing, or challenging conditions typically cost 2,500 to 4,000 dollars or more. These projects involve 200-amp subpanels with substantial capacity, very long feeder runs (over 100 feet) requiring large-gauge wire, underground feeder installation requiring extensive trenching, concrete boring or difficult routing paths, installation coordination with other construction trades during renovations, or complex grounding systems for challenging soil conditions. Some Los Angeles properties with difficult access, steep hillsides, or substantial distances between main panels and subpanel locations exceed even these estimates.
Several factors increase costs beyond baseline estimates. Main panel upgrades required to supply the subpanel add 2,000 to 5,000 dollars - a common necessity when existing 100-amp services can't support substantial subpanel loads. Trenching for underground feeders costs 8 to 15 dollars per linear foot depending on depth, soil conditions, and obstacles. Concrete boring through driveways, patios, or foundations costs 15 to 30 dollars per linear foot. Overhead feeder installation requiring poles or building-mounted supports adds 300 to 800 dollars. Installation in finished spaces requiring drywall repair, painting, or trim work adds 200 to 600 dollars. Each project presents unique challenges that professional electricians assess during site visits before providing accurate cost estimates.
Many homeowners discover that combining subpanel installation with related electrical projects reduces overall costs through shared labor, permitting, and inspection expenses. Installing subpanels during garage conversions, ADU construction, home additions, or major renovations maximizes value and minimizes costs compared to standalone retrofit installations. For comprehensive electrical planning supporting your project goals, our residential electrical services team can assess your needs and recommend optimal solutions.
Permits and Inspections in Los Angeles
Los Angeles requires electrical permits for virtually all subpanel installations, with specific permitting processes depending on project scope and whether work occurs as part of larger construction projects. Understanding permit requirements helps homeowners ensure legal, code-compliant installations that won't create problems during home sales or insurance claims.
Electrical permits serve multiple critical functions: ensuring qualified, licensed electricians perform the work, verifying installations meet current electrical codes, providing inspection oversight protecting public safety, creating official records of electrical system modifications, and satisfying insurance requirements for coverage of electrical installations. Installing subpanels without required permits creates code violations, potential insurance complications if electrical problems occur, complications during home sales when unpermitted work is discovered, liability exposure if electrical faults cause injuries or property damage, and potential requirements to remove work or bring it into compliance at significant expense.
The permit application process involves submitting applications to the Los Angeles Department of Building and Safety including project address and description, electrical plans showing subpanel location and specifications, load calculations and feeder details, contractor license information, and permit fees (typically 150 to 400 dollars depending on project scope). For standalone subpanel installations, plan review is often minimal, with permits issued within days. For subpanels installed during larger construction projects, electrical plan review coordinates with building plan review, potentially requiring additional time but ensuring comprehensive code compliance.
After installation, inspectors verify multiple critical safety elements: proper neutral-ground separation in the subpanel, adequate grounding and bonding, correct wire sizes for amperage and length, proper terminations and connections, appropriate circuit protection (GFCI, AFCI as required), correct labeling, and overall code compliance. Inspectors may identify deficiencies requiring correction before approving the installation - a valuable quality control process preventing dangerous conditions from going undetected. Professional electricians like those at Shaffer Construction rarely experience inspection failures because they install to code from the outset, but the inspection process provides important verification and official approval.
Only licensed electrical contractors can pull permits for electrical work in Los Angeles, making DIY subpanel installation effectively illegal regardless of the installer's knowledge or skills. This requirement protects public safety by ensuring qualified professionals perform complex electrical work. Homeowners hiring unlicensed handymen or attempting DIY installations to save money often discover that permit and inspection costs represent small fractions of total project expenses - false economies that create substantial risks and potential future costs far exceeding any savings.
Main Panel Capacity: Checking Before Installing Subpanels
Before installing any subpanel, professional electricians verify that your main electrical panel has sufficient capacity to supply the additional load without exceeding its rated amperage. This crucial step prevents dangerous overloading that could cause panel failure, fire hazards, or frequent nuisance tripping.
Most Los Angeles homes built before 1980 have 100-amp main panels, while homes built after 1980 typically feature 200-amp service. These ratings represent the maximum current the panel can safely supply continuously. However, the total amperage of all branch circuits and subpanels usually exceeds the panel rating because code allows demand factors - recognition that not all circuits draw maximum current simultaneously. Professional load calculations account for this diversity, determining how much additional load the panel can safely support.
To assess main panel capacity, electricians review the existing electrical panel noting the main breaker amperage rating, all existing circuit breakers and their amperage ratings, any large appliances or equipment currently served, space for adding feeder breakers, and overall panel condition and age. They then perform load calculations for existing circuits using standard calculation methods accounting for lighting loads, outlet loads, appliance loads, heating/cooling equipment, and any other electrical demands. Finally, they calculate total load including the proposed subpanel using its rated capacity and anticipated usage patterns, apply appropriate demand factors, and compare total calculated load to panel capacity.
If calculations reveal that adding the subpanel would exceed safe capacity limits, electricians recommend main panel upgrades before subpanel installation. This often represents the optimal solution - upgrading to a 200-amp main panel costs 2,500 to 5,000 dollars but provides capacity for the subpanel plus substantial future expansion capacity. Many Los Angeles homeowners discover that combining main panel upgrades with subpanel installations, EV charger circuits, and other electrical improvements creates the most cost-effective, future-proof solution. For detailed information about panel upgrades, see our comprehensive guide to electrical panel upgrades.
Some homeowners ask whether they can simply upgrade the main breaker to a higher amperage without replacing the panel. The answer is no - the main breaker rating must match the panel's bus bar rating, which is determined by the panel's physical design and cannot be changed. Installing oversized main breakers creates severe fire hazards and code violations. Professional electricians never compromise safety by oversizing breakers, instead recommending proper panel upgrades when capacity increases are necessary.
Frequently Asked Questions
Can I install a subpanel myself to save money, or do I need a licensed electrician?
California requires licensed electrical contractors for virtually all electrical work beyond simple repairs. Installing subpanels involves complex code requirements including neutral-ground separation, proper grounding, load calculations, and wire sizing that even experienced DIY enthusiasts frequently get wrong. Additionally, only licensed contractors can pull required electrical permits. Attempting DIY installation creates serious safety risks, code violations, permit problems, and potential liability. The modest cost savings don't justify the substantial risks - professional installation ensures safety, code compliance, and reliable performance.
How do I know if my main panel can support adding a subpanel?
Professional load calculations determine whether your main panel has adequate capacity. Licensed electricians analyze existing loads, calculate subpanel requirements, apply demand factors, and compare totals to panel capacity. Many 100-amp main panels can't support substantial subpanels without upgrading to 200 amps. Never assume you have available capacity - improper assessment creates dangerous overload conditions. Schedule a professional evaluation before planning subpanel installation.
What's the difference between a subpanel and a main panel disconnect?
Subpanels distribute power from the main panel to branch circuits but don't serve as service disconnects. Main panel disconnects shut off all power to the building and include utility connections. Subpanels have separate neutral and ground buses, while main panels bond them together. For detached structures requiring separate service (rather than subpanels fed from the main building), completely different requirements apply including service entrance equipment, utility coordination, and separate meter installations.
Can I use a subpanel to add circuits without upgrading my old fuse box?
Technically possible but generally not recommended. Old fuse boxes typically lack capacity to supply meaningful subpanels, often have deteriorated connections and components, don't provide ground fault or arc fault protection required for new circuits, and create code compliance complications. Most electricians recommend replacing fuse boxes with modern breaker panels rather than adding subpanels. The complete panel upgrade provides better value, safety, and functionality than attempting to extend old fuse systems.
How long does subpanel installation take?
Installation time varies from half a day for simple installations in accessible locations to several days for complex projects requiring trenching, concrete boring, or extensive feeder routing. A typical garage subpanel installation in an accessible location takes 6 to 10 hours including feeder installation, subpanel mounting, circuit setup, and testing. Detached structure installations requiring trenching may require 2 to 3 days accounting for excavation, conduit installation, backfilling, and electrical work. Scheduling inspection adds several days to project timelines depending on inspector availability.
Do I need separate subpanels for my garage and ADU, or can one panel serve both?
Code requires ADUs to have dedicated panels separate from the main house and other structures. You cannot combine ADU circuits with garage circuits in a single panel - they must be completely separate. This requirement ensures the ADU has independent electrical shutdown capability and prevents tenant access to circuits serving other structures. Install separate subpanels for the garage and ADU, each appropriately sized for its specific loads.
Will adding a subpanel increase my electricity bills?
No - subpanels simply distribute electricity and don't consume power themselves. Your electricity costs depend on what equipment and appliances you connect to the subpanel circuits, not the subpanel installation. However, expanding electrical capacity often enables adding equipment that does increase usage - EV chargers, workshop tools, additional lighting, or appliances. Budget for potential usage increases from new equipment, not from the subpanel itself.
Can I install outdoor subpanels, or do they need to be inside buildings?
Outdoor subpanel installation is allowed using weatherproof enclosures rated for exterior exposure (typically NEMA 3R or better). Outdoor panels must be mounted securely to prevent physical damage, located in accessible locations for service, and positioned to prevent water intrusion into openings. Many Los Angeles detached garage and pool house installations use outdoor panels to avoid routing feeders inside structures. However, outdoor panels experience harsher environmental conditions than indoor installations and may require more frequent maintenance or eventual replacement. Indoor installation in protected locations generally provides longer service life when practical.
Conclusion
Subpanel installation represents one of the most valuable electrical upgrades Los Angeles homeowners undertake, expanding circuit capacity, supporting modern electrical demands, enabling property improvements, and providing flexibility for future additions without the full expense of main panel replacement. From garage workshops requiring multiple circuits for power tools and EV chargers to ADUs demanding complete electrical systems, from home additions extending living space to detached structures requiring reliable power distribution, subpanels solve diverse electrical challenges while maintaining code compliance and safety. Understanding when subpanels are necessary, proper sizing based on anticipated loads, correct installation techniques including critical neutral-ground separation, appropriate wire sizing accounting for voltage drop, and thorough code compliance empowers homeowners to plan successful projects delivering decades of reliable service.
While the technical complexity of subpanel installation might tempt some homeowners to attempt DIY approaches, the intricate code requirements, safety implications of improper installation, permit and inspection necessities, and specialized knowledge required for proper wire sizing and configuration make professional installation essential rather than optional. Licensed electricians bring expertise, tools, and experience ensuring installations meet all code requirements, pass inspection on the first attempt, operate safely and reliably, and provide the flexibility and capacity homeowners expect. The modest cost difference between professional and DIY installation shrinks to insignificance when considering the substantial risks of improper work - fire hazards from undersized wires or incorrect terminations, shock hazards from neutral-ground bonding errors, code violations preventing home sales or creating insurance complications, and failed inspections requiring complete reinstallation.
Whether you're planning a garage conversion, ADU construction, home addition, EV charger installation, or any project requiring substantial electrical capacity at locations distant from your main panel, starting with professional consultation and load calculations ensures your electrical infrastructure supports both current needs and future expansion. The combination of proper panel sizing, correctly sized and routed feeders, meticulous neutral-ground separation, comprehensive grounding systems, and thorough code compliance creates electrical distribution systems serving your property reliably for decades while protecting occupants, property, and investments.
For expert subpanel installation in Los Angeles, including garage panels, ADU electrical systems, workshop power distribution, and complete residential electrical services, contact Shaffer Construction, Inc. Our licensed, experienced electricians have designed and installed hundreds of subpanels throughout the Los Angeles area, delivering code-compliant installations that pass inspection and provide the capacity, safety, and reliability our clients demand. We handle all aspects of subpanel projects from initial consultation and load calculations through professional installation, permitting, inspections, and ongoing support. Whether you need a simple 60-amp garage panel or a complex 200-amp ADU service, we provide the expertise and quality workmanship your project deserves. Call us at 323-642-8509 or email hello@shaffercon.com to schedule your free consultation and electrical assessment. Visit www.shaffercon.com to learn more about our comprehensive residential and commercial electrical services and discover how we can expand your electrical capacity safely and professionally. Don't compromise on electrical safety or code compliance - trust Shaffer Construction's licensed electricians to deliver subpanel installations that exceed your expectations and serve your property reliably for decades to come.